BackupAssist Support at rsync.net
BackupAssist is a powerful Windows backup tool suitable for enterprise use.
It properly handles all manner of open files and databases, system imaging, Exchange mailbox splitting, Hyper-V backup, etc.
Use of BackupAssist requires a license, which you will need to purchase from BackupAssist.
Installing BackupAssist
BackupAssist must connect to rsync.net using the Rsync Internet Backup version of BackupAssist.
The default installation options are all you need to interoperate with rsync.net.
If you have a non-rsync BackupAssist version installed, please contact support@rsync.net for information on adding this functionality.
Choosing What to Back Up
After you have installed BackupAssist, launch the program and choose your backup type on this screen:
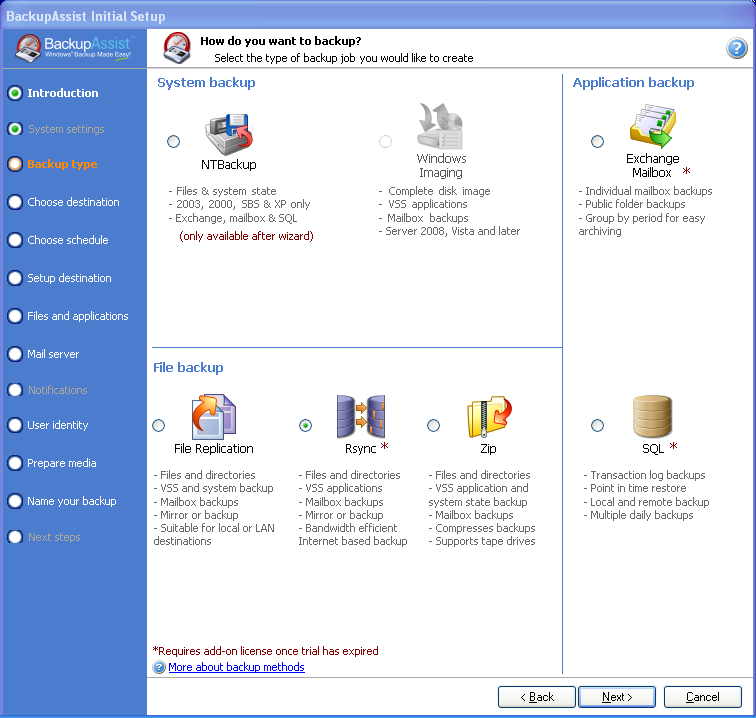
In this example, we will choose "Rsync" as our backup method, and on the next screen we will choose "Rsync" as the backup destination (do NOT choose S3Rsync).
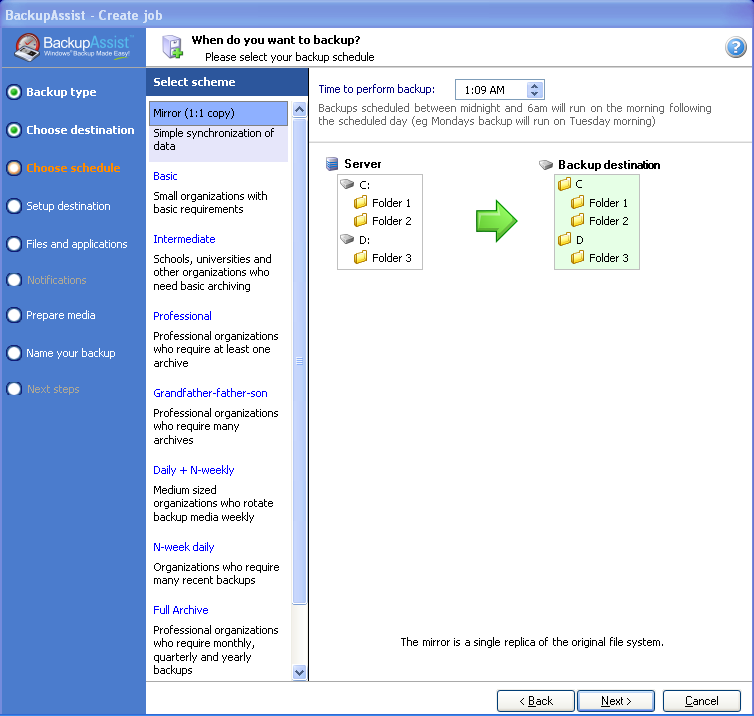
On the next screen, you will be asked "When do you want to backup?" - choose the time that makes the most sense for your network (typically midnight or 1am).
IMPORTANT: Please add some random number after the hour, in the minutes field. It helps us greatly if hundreds of customers do not all initiate backups at exactly midnight. See the example below.
You should almost certainly choose the "mirror" scheme on the left. Any of the schemes will work just fine, but REMEMBER, rsync.net performs daily snapshots, or versions of your entire filesystem on our end, so you can just choose the simple "mirror" scheme and leave the versioning up to our filesystem.
Setting Your Account
On the next screen, specify your rsync.net server address (see your welcome email), "Path on Server" and username.
"Path on Server" should contain NO slash characters ( / ) - path on server should be a single word, with no spaces. The name of this system that you are backing up is a good choice.
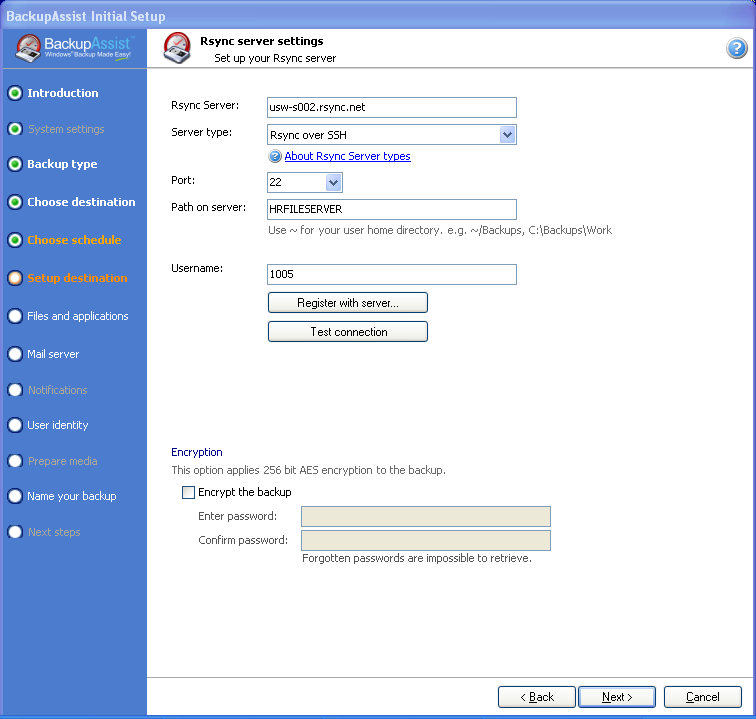
Now click the "Register with server" button, and you will be presented with a command window asking you to confirm this first connection:
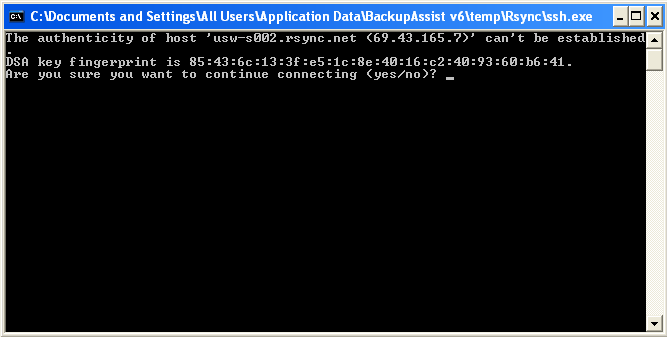
Type "yes" and hit enter, and then enter your rsync.net password when prompted. The command window will go away and you should see a "Registration successful" signifier on the screen.
You can enable Encryption, but please do contact rsync.net support to discuss this first.
Choosing What to Back Up
On the next screen, under the "Files and Applications" tab, you will choose what files and folders on your system to back up.
Although you could simply check the entire drive, in this example we have expanded the checklist and chosen "Documents and Settings" and "Program Files":
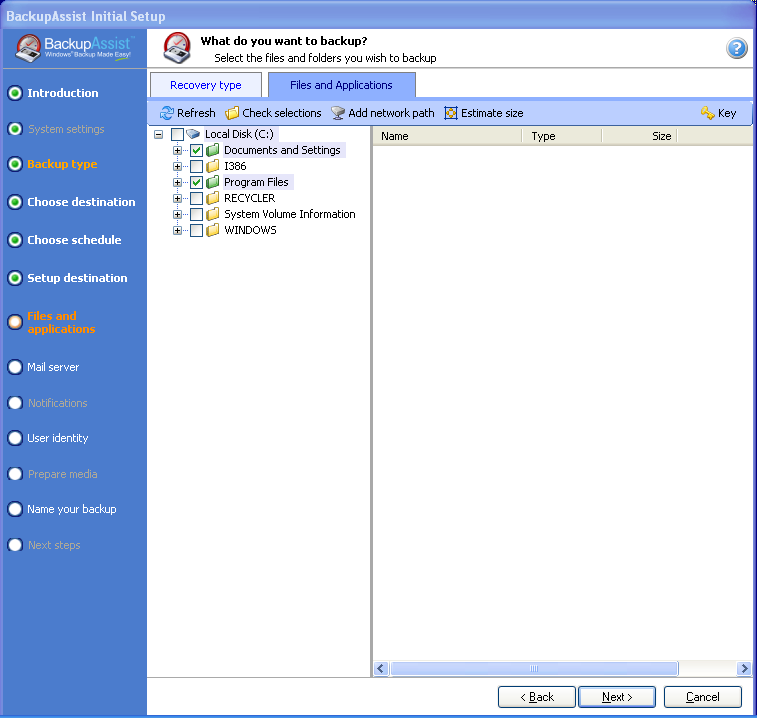
NOTE: These choices are only an example, and the files and folders you back up will most certainly be different.
Setting Email Alerts
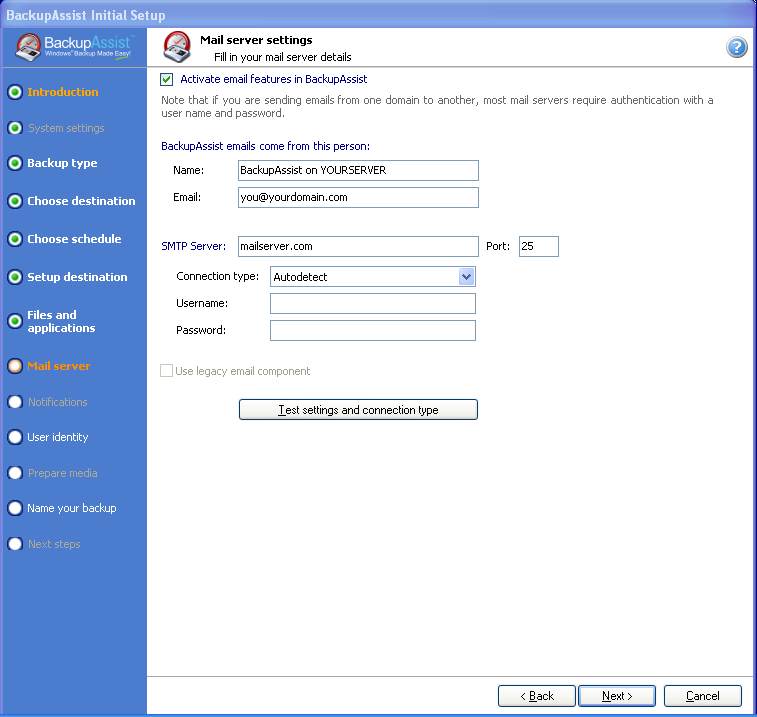
On the next screen, you can optionally configure settings for email alerts.
NOTE: these are not rsync.net settings - these are your own mailserver and user that you are configuring here.
NOTE: If you cannot select the "notifications" choice, you need to "Activate Email Features in BackupAssist". From BackupAssist Home, choose "Modify Settings", Email server settings, then check "Activate Email Features in BackupAssist".
Backup User Identity
In the next screen, you are required to specify a user account that should perform the backups.
If you are just installing BackupAssist on a single system that will NOT be pulling backup data from other servers or shares, you can just choose "Use your local system login". This choice is especially preferred if this is a simple Windows XP or Windows 7 workstation.
However, if you are configuring a more complex network, where this computer pulls backup data from other members of the domain, etc., then you need to provide a backup user identity.
Some support threads that may be helpful:
Backup User Identity Question (SBS 2008 Domain)
Specifying a User to Perform Backup Operations
Final Settings and Initial UNSCHEDULED run
After you configure the user to perform backup operations, the next screen will ask you to name your backup job.
You may now click the "Finish" button, and you will be taken to the BackupAssist control panel.
At this time you should SUSPEND your newly created backup job by selecting the job in the control panel and then clicking the "Suspend" button above the jobs listing:
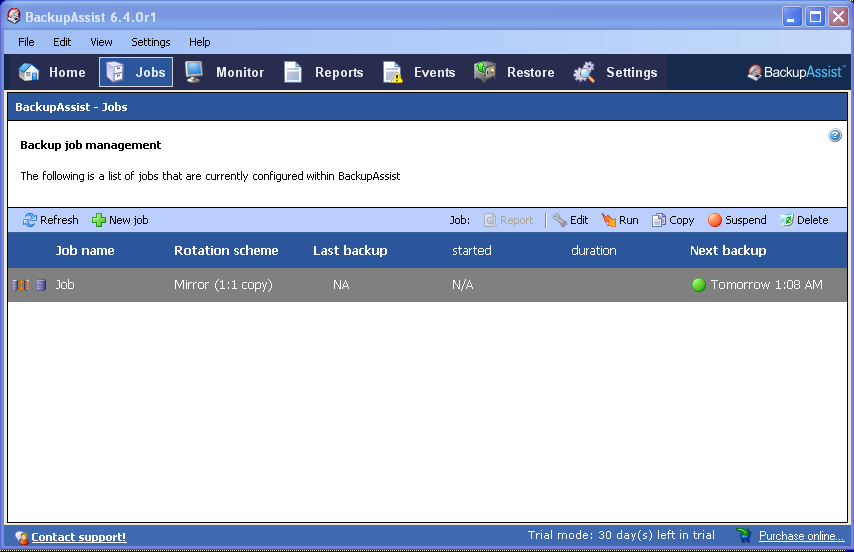
The reason we are suspending the job is because we do not know how long the initial upload will take - if the initial upload takes more than 24 hours, you would have multiple processes running on top of each other. Instead, we will suspend the job and run it manually the first time.
Now click the "Run" button above your selected job, and in the screen that comes up, choose "re-run a past backup", then click the "Run" button.
Your backup job will now begin running, manually. When the backup job completes, return to the "Jobs" tab and click "Activate" so that the job is no longer Suspended. The job will now run on the schedule that you configured, above.
Maintaining Your Backup Job(s)
You have now created a single backup job. You can, of course, create additional backup jobs to run at different times, to backup different files, etc. You can do this in the "Jobs" tab of the BackupAssist control panel - simply click the "New Job" button on the left side of the screen.
You may also click on a job and then click the "Report" icon to view a summary of the job, what errors (if any) were encountered, and view statistics on your backup.
Restoring Files
Restoring data with BackupAssist is done with the BackupAssist Restore Console.
This is explained in detail here.
First, in the BackupAssist control panel, click the "Restore" tab, and then choose "BackupAssist Restore Console" from the resulting screen:
You may see a summary/informational page, but after clicking "next" you will be asked where to load backups from:

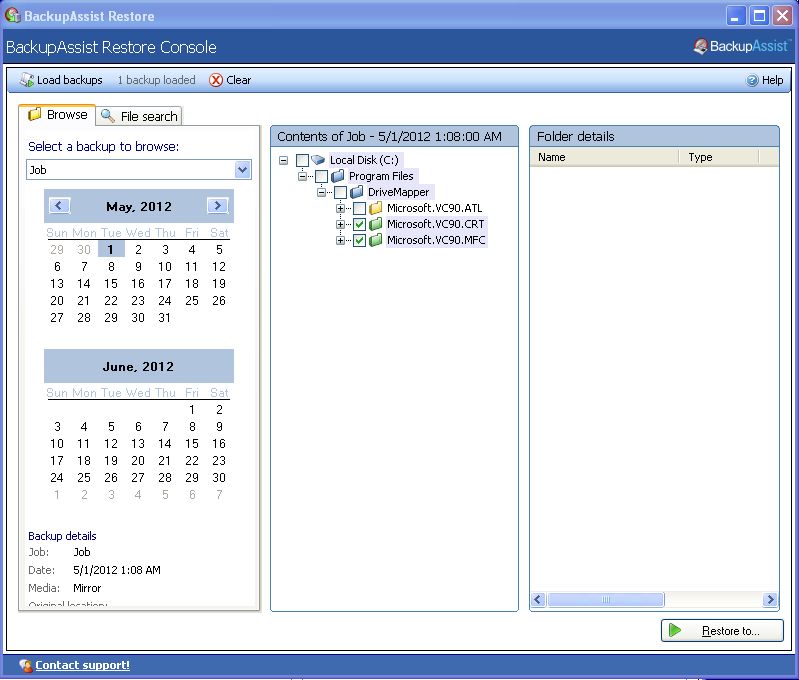
Click the button "Load all known backups". Now, in the upper left of the screen, you are asked "Select a backup to browse" - in that list, choose one of your backup jobs.
After selecting the backup job you wish to restore, the calendars on the left will show highlighted dates with completed backup jobs - select the date of the backup you wish to restore from.
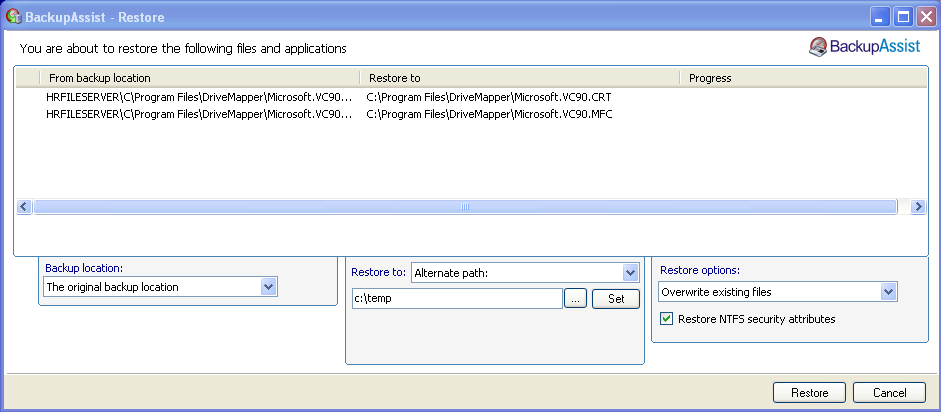
You will then see, in the middle of the screen, a "Contents of YOUR JOB" with a list of the directories inside your backup. You can simply select the very top directory to restore everything, or you can expand that list to choose individual directories or files underneath. In this example, we are restoring just two files in the C:\Program Files\DriveMapper directory:
Now click the "Restore to" button in the lower right corner of the screen and choose where to restore the files to.
NOTE: although "Restore to: Original location" is the default, and may sound like the best idea, you should consider restoring files to a temporary location and then deciding whether to overwrite or destroy existing files on your system.
As you can see in this example, we have chosen to restore to "Alternate Path" and set that alternate path to "C:\temp":